Introduction
Did you know that 89% of millennials plan their travel destinations based on Instagram-worthy photo opportunities? The allure of capturing breathtaking moments while exploring the world has never been stronger! As an aspiring photographer who’s documented adventures across 6 countries, I can tell you that travel photography isn’t just about owning expensive gear – it’s about telling compelling visual stories. Whether you’re dreaming of capturing sunset shots in Santorini or street scenes in Tokyo, this guide will show you how to start travel photography.
Essential Photography Gear for Travelers
I find many opportunities to learn new and better ways of doing things all the time. In other words, I make lots of mistakes and learn lessons along the way. I still remember lugging around a massive DSLR kit through the streets of Paris, dodging puddles and open trenches from street construction, while watching other tourists snapping amazing shots with their smartphones. That kind of experience will humble you fast.
Let’s break down what you actually need (and what you should probably skip) based on my experiences learning the hard way…
Camera Choices
You don’t need to drop two grand on a fancy camera right out of the gate. Modern smartphones, especially the latest iPhones and Pixel phones, can capture quality travel photos. I’ve had 20×30 prints from my phone hanging in my living room that visitors swear were taken with a professional camera.
But if you’re ready to step up your game, here’s my honest take on the DSLR vs. mirrorless debate:
Mirrorless cameras are where it’s at for travel these days. I switched from my trusty Canon DSLR to a Sony a6000 and the weight difference alone was worth it. For beginners, I’d recommend looking at something like the Sony a6100 ($800) or Fujifilm X-T30 II ($900). They’re not too intimidating, and they’ll grow with you as you learn.
Travel-Friendly Camera Lenses
Save yourself some money now – you don’t need six different lenses in your bag. For starting out, here’s what I suggest:
- A versatile zoom lens (24-70mm equivalent): This will handle 80% of your travel shots
- A “nifty fifty” prime lens: Great for street scenes and low light
- Optional: A wide-angle lens if you’re into architecture or landscapes
I used to pack every lens I owned, but now I typically travel with just two. Having to stop and change lenses can really take you out of the moment early on. If you are very new to the hobby, your kit lens is more than enough to get you started. Take your time learning, experiment with techniques while developing a personal style, and save up money to invest in the right lens for your style later.
Accessories That Are Actually Essential
When it comes to accessories, here’s what you genuinely need:
- Two high-speed SD cards (You don’t want to have one die in the middle of a trip!)
- A lightweight travel tripod for sunrise/sunset shots
- A good cleaning kit (dust is the enemy of travel photography)
- Portable backup solution (I use a combination of a portable SSD and cloud storage)
Protection Without Paranoia
I often travel by myself, so personal safety is a big concern. Part of that means using luggage and travel bags that don’t broadcast that I’m carrying expensive photography gear. The Peak Design Everyday Backpack 20L ($259) looks like a regular backpack but has fantastic camera organization inside.
Budget Breakdown
A common expression I learned early on is “date your camera body, marry your lenses.” In practice this is very true. You’re much better off saving some money looking for a decent camera body on the used market. Learn while saving up for a lens upgrade to see the best results. With that in mind, let me break down three setups based on what I’d recommend:
Beginner Setup ($800-1,200):
- Used mirrorless camera body: $500
- Kit lens + 50mm prime: $200-300
- Basic tripod: $50
- Memory cards and cleaning kit: $100
Intermediate Setup ($2,000-2,500):
- New mirrorless camera: $1,200
- Two quality lenses: $800
- Better tripod: $200
- Quality bag and accessories: $300
Advanced Setup ($3,500+):
- Pro-level mirrorless body: $2,000+
- Pro lenses: $1,000+ each
- Professional tripod: $500
- Full filter kit and pro accessories: $500+
Here’s a pro tip to save money: buy used gear from reputable sellers like KEH or B&H Photo’s used department. My first “real” camera was a used model that served me perfectly. Just make sure to check the sensor condition and shutter count before buying and make sure you understand the seller’s return or exchange policy.
Remember, gear is important, but it’s not everything. I’ve seen folks with entry-level setups take magnificent photos. Start small, learn the basics, and upgrade as your skills and needs grow.
Want to know the funniest part? Some of my favorite travel photos were taken with my smartphone while my expensive camera gear was safely packed away in my bag. Sometimes the best gear is the one that’s easiest to use in the moment!
Mastering Camera Settings and Technical Basics
I still remember staring at my first “real” camera like it was some kind of alien technology. All those buttons and dials! I had borrowed a Canon DSLR for a trip to France, and wow, was I overwhelmed. But once you break down the basics, it’s not nearly as complicated as it looks.
Understanding the Exposure Triangle
Think of the exposure triangle like cooking – ISO is your heat level, aperture is your pot size, and shutter speed is your cooking time. When I first started out, I kept ISO at 100 because almost every tutorial on YouTube made it seem like that was how to get the best quality photos. Don’t do that! During a sunset tour in Paris, all my photos came out crazy dark. Now I know better – don’t be afraid to bump up that ISO when you need to, especially in those dimly lit European churches or during blue hour. Sure, you might get a bit of grain at ISO 3200, but that’s way better than a blurry or black photo!
Best Camera Modes for Different Scenarios
Here’s something I wish I knew sooner: You don’t have to shoot in full manual mode to be a “real” photographer. I spent my first vacation fumbling with settings while missing amazing moments. These days, here’s what I actually use:
- Aperture Priority (A or Av mode) for 80% of my travel shots. It’s perfect for controlling depth of field while letting the camera handle shutter speed. I use f/8 for landscapes and f/2.8-4 for portraits or food photos.
- Shutter Priority (S or Tv mode) for moving subjects. Think waterfalls (1/2 second for smooth water) or street performers (at least 1/250 for sharp action).
- Program mode when I’m just walking around and want to focus on composition instead of settings.
Tricky Lighting Situations
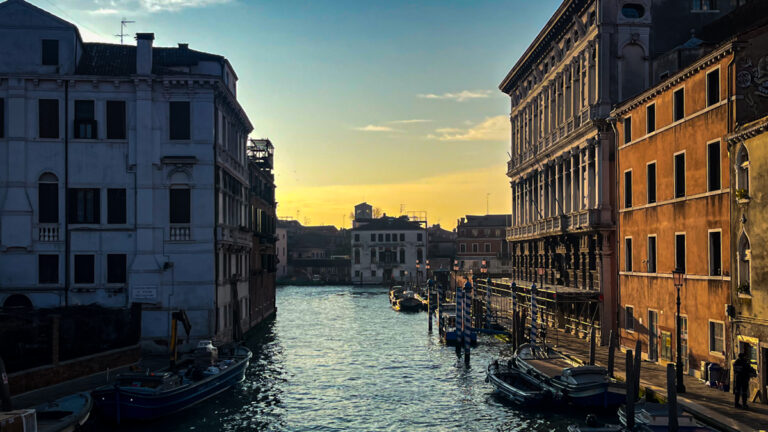
The most challenging lighting situation I’ve faced? Definitely that time I was trying to photograph the dark streets of Venice at night while bright lights streamed through the windows of the palazzos. Here’s what I’ve learned works:
- Bracket your exposures (take multiple shots at different exposures) when dealing with high contrast scenes
- Use exposure compensation liberally (+1 for backlit subjects, -1 for bright scenes)
- Look for open shade when shooting portraits in harsh midday sun
Focus Techniques That Actually Work
After accidentally taking an entire series of slightly-out-of-focus shots of Arenal Volcano National Park, I’ve developed a foolproof approach:
For landscapes:
- Switch to manual focus
- Use live view and zoom in to check sharpness
- Focus about 1/3 into the scene (not on the horizon!)
- Use f/8 to f/11 for maximum depth of field
For street photography:
- Zone focusing is your friend (pre-focus to about 8 feet away at f/8)
- Use back-button focus instead of half-pressing the shutter
- For moving subjects, continuous AF mode is your best friend
RAW vs. JPEG – The Real Deal
This feels like a huge debate online when you first learn about photography. But the best way to shoot may depend on what you’re using your photos for. Shoot RAW if you have the storage space. RAW files give you so much more flexibility in post-processing which can make for great prints. JPEGs are great for casual shooting and uploading to social media.
Storage tip: Bring twice as many memory cards as you think you’ll need. I always pack at least 128GB worth of cards for a week-long trip. Nothing worse than having to delete photos because you ran out of space!
Quick Settings Cheat Sheet:
- Landscapes: f/8-f/11, ISO 100, tripod if possible
- Street scenes: f/5.6-f/8, ISO 400, 1/250 sec minimum
- Indoor architecture: f/8, ISO 1600-3200, stabilization on (if your camera body or lens have it)
- Sunset/sunrise: f/8, ISO 400, bracket exposures
Remember, these are starting points – not rules set in stone. I’ve messed up plenty of times, but that’s honestly how you learn. The key is to practice with these settings before your trip so they become second nature.
Travel Photography Composition Techniques
My first attempts at travel photography were absolutely cringe-worthy. I still have this photo of the Eiffel Tower where I perfectly centered it, like every other tourist, with a terrible blue sky background, zero visual interest, and slapped on a built-in filter. Is the memory nice? Absolutely! Is it a good photo? No, not particularly.
Composition can really make or break travel shots. Let‘s go over some tips that will improve your photography right from the start.
The Rule of Thirds
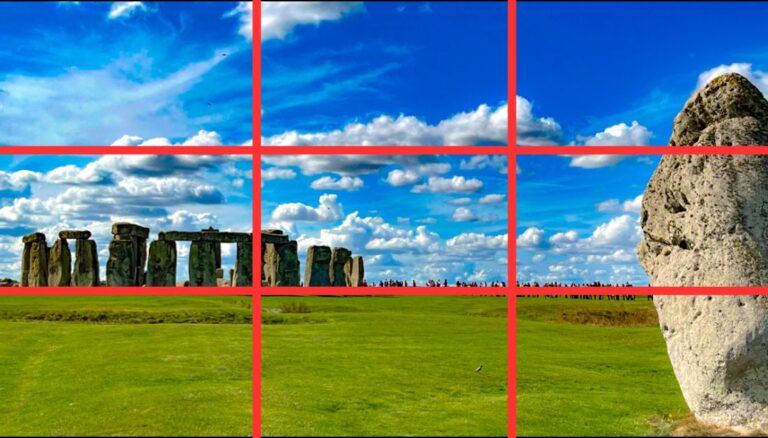
The rule of thirds is like the training wheels of composition. Use your camera’s built-in grid feature.
The magic isn’t just placing elements on the intersections. I’ve found that leaving negative space in two-thirds of the frame often creates more dramatic shots. This is also a great way to begin experimenting with visual storytelling.
Leading Lines: Your Secret Weapon for Depth
You wouldn’t believe how long it took me to understand leading lines. I kept wondering why my photos felt so flat. What you have to realize is that roads, rivers, and fences aren’t just objects in a shot; they’re tools to guide the viewer’s eye.
My favorite technique now is finding natural pathways in landscapes. Stone walls in the countryside, winding mountain trails, even the curve of a coastline – these elements can transform a boring shot into something that pulls you right into the scene.
Creating Depth in Landscapes
I messed up so many landscape shots before figuring this out: you need something interesting in your foreground, middle ground, AND background. Mountains may look beautiful on their own, but taking the time to create depth and scale will take your photo to a new level.
Try this: Next time you’re shooting a landscape, find something eye-catching in the foreground – maybe some wildflowers, an interesting rock formation, or even just some textured ground. Position it in the bottom third of your frame (use those grid lines!). Then make sure you’ve got something in the middle distance, like trees or buildings, before leading to your main background subject.
Street Photography: Capturing Real Moments Without Being Creepy
As an introvert, street photography scared the heck out of me at first. I felt super awkward taking photos of strangers. What worked for me was finding busy intersections or popular gathering spots and pretending to photograph the architecture (I know, I know, but hey – whatever works!).
Pro Tip: anticipation is everything. If you see an interesting background or light pattern, wait there for someone to walk into your frame. Sometimes it pays to be patient rather than chase moments.
Landmark Photos Without the Tourist Crowds
I’m not a morning person by any means, but the best way to get a crowd-free photo is to show up at sunrise. I mean ACTUAL sunrise, not “early morning.” Plan out your shots in advance and get going as early as possible. The results will be worth every painful, caffeine-deprived second.
If dawn missions aren’t your thing, try these alternatives:
- Shoot from unexpected angles (most tourists stick to the obvious front view)
- Use foreground elements like archways or trees to frame the landmark and hide crowds
- Focus on interesting architectural details instead of the whole structure
Remember, composition isn’t about following rules perfectly – it’s about using them as guidelines to create photos that tell better stories. Rules were made to be broken, including the ones discussed in this post. The trick is understanding why these techniques work, then making them work for your style.
What’s really important is getting out there and practicing. Your first attempts might be as awkward as my centered Eiffel Tower shot, but that’s totally okay. We all start somewhere, and honestly, those “bad” photos become pretty entertaining later on.
For more information, check out my guide on How to Photograph Landmarks without Tourists.
Planning and Research for Photo Trips
I’ve planned trips with detailed itineraries. And I’ve travelled while planning activities up to the night before. Your own personal style may vary. If you’re short on time, the planning would be the way to go.
Great travel photos start way before you pack your camera bag. Let me share some tips to get you started.
Finding Those Picture-Perfect Spots
First things first – location scouting is your best friend. I use Google Earth religiously now. It lets you virtually explore areas and even see what different spots look like during various seasons. Pretty neat, huh?
Instagram and 500px have become my go-to research tools, but don’t just look at the popular spots. Dig deeper into local photographers’ feeds. They often share hidden gems that aren’t overcrowded with tourists. This can also help you build out your network.
Timing Is Everything
I can’t stress this enough – download some decent apps for tracking light conditions. I swear by PhotoPills ($10.99, but worth every penny) for planning sunrises and sunsets. The augmented reality feature shows you exactly where the sun will be at any time.
Clear Outside is another tool for weather forecasts specifically tailored for astronomers. Nothing’s worse than driving hours only to find unexpected cloud cover.
The Boring-But-Super-Important Legal Stuff
It’s very important to remember that certain locations will have restrictions on photography. Some national parks require permits even for personal photography if you’re using a tripod. And don’t even think about flying that drone without checking local regulations first!
Pro tip: Make a checklist of required permits for each location. I keep a simple spreadsheet with:
- Location name
- Permit requirements
- Cost
- Where to obtain permits
- Special restrictions
Creating Your Shot List
There are times when you can just wing it and hope for the best. During your trip planning process it’s also a good practice to begin planning your shots. Try creating detailed shot lists for each destination, including:
- Must-have shots
- Backup locations (because weather happens)
- Best time of day for each spot
- Specific gear needed
- Estimated walking/hiking time between locations
I organize everything in Notion now. It might sound over-the-top, but – when you’re jet-lagged and trying to remember which waterfall you wanted to shoot at sunrise, you’ll thank me.
Finding Unique Perspectives
When it comes to finding unique shots – arrive at popular spots super early, but don’t just shoot the obvious angle. While everyone’s pointing their camera one way, look behind you. Try seeing what everyone else was missing.
Local tour guides can be goldmines of information. I always budget for at least one local photography tour early in my trip. The insights they share about hidden spots and local conditions are worth way more than the tour cost.
Planning might seem like a buzzkill when you’re excited about a photography trip, but it’s absolutely worth the effort. Your future self will be mighty thankful when you’re coming home with unique shots instead of the same old tourist photos everyone else has.
Post-Processing Your Travel Photos
You know that sinking feeling when you get home from an amazing trip, load your photos onto your computer, and think “these don’t look anything like what I saw!” But where do we go from here? Let’s talk about nailing down a workflow that actually works.
You don’t need to break the bank on editing software. When I started out, I thought I needed the full Adobe Creative Suite to make my photos pop. That was a waste of money. For beginners, I honestly recommend starting with Lightroom (about $10/month). DarkTable is another fantastic free option that’s gotten me through plenty of editing sessions.
Getting a Workflow Started
Here’s my dead-simple editing workflow:
- Import and backup IMMEDIATELY (I learned this after losing all my Iceland photos to a corrupted SD card – still hurts to think about)
- Cull the bad shots (be ruthless – nobody needs 47 photos of the same sunset)
- Basic adjustments: exposure, contrast, whites/blacks
- Color temperature adjustment (this is where the magic happens)
- Local adjustments like dodging and burning
- Export with consistent settings
Color Grading
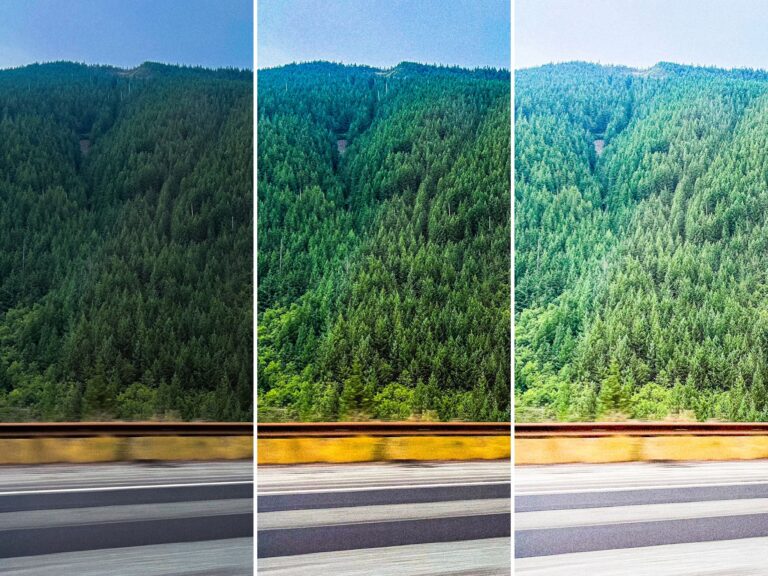
This is where most beginners go completely off the rails. You don’t need those fancy preset packs promising “that Instagram travel influencer look.” Instead, focus on getting the white balance right first. I usually start by setting it manually using a neutral area in the photo, then fine-tune based on how I remember the scene.
Want to know a trick for consistent colors? I started using the HSL panel to target specific colors instead of just cranking up the saturation slider. For example, if you want those gorgeous blue Mediterranean waters to pop, try slightly boosting just the blue luminance and saturation instead of affecting the whole image.
Organizing and Backing Up Photos
For organization, I used to be a complete mess – just dumping everything into one folder named “Travel Pics 2019.” Now I use a year/location/date system:
2024/CostaRica/2024-06-15_Monteverde
As for backing up? Always follow the 3-2-1 rule:
- 3 copies of your photos
- 2 different types of storage (I use external hard drives and cloud storage)
- 1 copy stored off-site (cloud storage counts)
Mobile Editing
Let’s talk mobile editing because sometimes you just need to get that shot up on social media while you’re still traveling. Here’s what I actually use:
- Snapseed (free and incredibly powerful)
- VSCO (great for subtle color grading)
- Lightroom Mobile (syncs with desktop, which is super handy)
Pro tip: don’t edit your travel photos when you’re jet-lagged! You don’t need to stay up all night working on a project only to wake up the next day and realize you made everything look radioactive green.
One last thing about mobile editing – always save your original files! I can’t tell you how many times I’ve gone back to re-edit a photo because my first attempt looked great on my phone but terrible on a bigger screen. This becomes more important when you want to order larger prints of your photos.
Remember, the goal isn’t to make your travel photos look like someone else’s – it’s to enhance what you actually saw and felt in that moment. Sometimes that means pulling back the saturation instead of pushing it. And yeah, maybe your style will change over time (mine sure has), but that’s part of the journey.
What’s worked best for me is developing a consistent editing style that I can apply to all my travel photos. It makes my portfolio look cohesive and it’s cut my editing time in half. Just don’t do what I did and create 27 different presets before settling on one that works!
Building a Travel Photography Portfolio from Scratch
Creating Your Visual Style – Finding Your Photography Voice
When I first started travel photography, I tried to copy every stunning Instagram shot I saw. My portfolio looked like a jumbled mess of different styles. It took me about two years to realize that developing your own consistent visual style is absolutely essential and it doesn’t happen overnight.
I started by picking three main colors that kept catching my eye in my favorite shots. For me, it was deep blues, warm earth tones, and forest greens. Once I focused on these colors, my editing style naturally evolved to emphasize them. Pro tip: stick to one primary editing preset and make minor tweaks from there. Your followers will start recognizing your photos before they even see your name!
Choosing the Right Platforms
You don’t need to be on every single platform. You’ll burn yourself out trying to maintain accounts on six different sites! These days, I focus on three main platforms:
- Instagram: Still the heavyweight champ for travel photography. Post your absolute best work here.
- BlueSky: Twitter alternative with great photography communities.
- A personal website: Your photography home base (more on this in a minute).
What about social media presence? Well, here’s something most influencers won’t tell you – consistency beats frequency every time. The key is engaging with your audience genuinely. When someone leaves a thoughtful comment on your sunrise shot from the Grand Canyon, don’t just drop a heart emoji – share a quick personal story and further the conversation.
Writing Captions That Actually Add Value
This is where so many talented photographers drop the ball. Your stunning photo of the Amalfi Coast doesn’t need another generic “Views for days 😍” caption. Instead, tell us about the elderly Italian gentleman who showed you this secret spot, or share the best time to visit to avoid the crowds.
I’ve found that my highest-performing posts follow this simple formula:
- First line: Hook them with something unexpected
- Middle: Share a specific story or useful tip
- End: Ask a question to encourage engagement
Building Your Photography Website
Now, about your website – you don’t need anything fancy when you’re starting out. A basic Squarespace template will suffice early on. The most important elements are:
- A clean gallery layout that loads quickly
- Clear navigation between different photo categories
- An about page that shows your personality
- Contact information that’s easy to find
One thing I wish I’d known earlier: optimize your image sizes! Nothing kills a photography website faster than massive files that take forever to load. I use ImageOptim to compress my photos before uploading them.
Creating a Strong Portfolio Flow
Your portfolio needs to tell a story. Don’t just throw all your best shots together! I organize mine by both location and theme. For example, a “Morning Light in Asia” collection which flows from misty Myanmar temples to sunrise over Vietnamese rice terraces.
Remember to update your portfolio regularly, but don’t feel pressured to include every decent shot you take. I probably use about 10% of the photos I take in my actual portfolio. Sometimes the technically perfect shot isn’t the one that tells the best story.
A killer portfolio isn’t built in a day. It’s totally okay to start small and grow gradually. Focus on quality over quantity, develop that consistent style, and most importantly – shoot what genuinely excites you. Your authenticity will shine through in your work, and that’s what’ll make your portfolio stand out in this crowded field.
Monetizing Your Travel Photography
In this day and age there comes a time in the life of an artist where you look at your creations and think “how do I monetize this?” The good news is that there are more ways than ever to try and monetize content. Let’s talk about some ways that may work for you.
Stock Photography Opportunities
First up – stock photography. The name of the game is volume and specificity. When I first started, I uploaded 50 generic sunset photos to Shutterstock and wondered why I wasn’t making money. That’s no way to stand out! What actually sells are super-specific images that businesses need. Think “woman working on laptop in Balinese villa” or “senior couple reading map in Tokyo subway.”
Quick tip on stock photos: Don’t just upload to one platform. I distribute my images across Shutterstock, Adobe Stock, and Getty Images. Each platform has different requirements for metadata and keywords, but taking the time to do this right makes a huge difference in visibility.
Working With Tourism Boards and Hotels
Working with tourism boards can be an exciting opportunity. Here’s what nobody tells you: start local. Before reaching out to Visit Thailand or the Maldives tourism board, try to build out a portfolio by collaborating with smaller regional tourism offices and local hotels.
Selling Presets and Tutorials
Creating and selling presets can become a great passive income stream. The most successful are those that solve specific problems. My “Moody Mountain Mornings” preset pack sells well because it addresses a specific challenge: making cloudy, flat mountain photos look dramatic and engaging. I price them at $24.99, which seems to be the sweet spot for serious hobbyists.
Travel Photography Assignments
Let’s talk about landing those coveted travel photography assignments. Editors care more about your ability to tell a story than your technical skills. Try to pitch a story that includes a shot list and detailed narrative outline along with sample images. That will demonstrate a greater level of engagement than just linking a portfolio.
Developing Passive Income Streams
For passive income there are many options to explore. Detailed photography location guides sells surprisingly well. Just as with presets, the goal here is to save people time and solve a problem. Guides can include exact GPS coordinates, best times for lighting, and required gear for each location.
One thing that you might not expect is how much hotels value behind-the-scenes content. While everyone’s fighting to get the perfect infinity pool shot, try offering hotels packages that include staff portraits and kitchen action shots. These images are gold for their social media and recruitment efforts, and they’re willing to pay premium rates for them.
Remember this: diversification is crucial. Don’t put all your eggs in the Instagram influencer basket.
The most frustrating part? Dealing with clients who want “exposure” as payment. I’ve learned to respond with a friendly but firm email template explaining my value proposition. You’d be surprised how often these turn into paid gigs when you stand your ground professionally.
Want my best piece of advice? Start building your signature style now. The travel photography market is saturated, but there’s always room for distinctive perspectives. Whether mastering drone photography for resorts or specializing in food tourism shots, finding your niche is crucial for standing out and commanding higher rates.
Remember, it’s totally fine to start small. Progress takes time, but with consistent effort and strategic planning, you can absolutely build a sustainable income from travel photography.
Wrapping Things Up
Starting your travel photography journey doesn’t have to be overwhelming! Begin with the basics, practice consistently, and remember that every professional photographer started exactly where you are now. Focus on developing your unique style while mastering the technical aspects, and don’t forget to enjoy the journey itself. Ready to turn your travel dreams into stunning photographs? Grab your camera, pack your bags, and let’s begin this exciting adventure!

